Redact a support screenshot without hiding the useful context
Practise opaque screenshot redaction on three fictional values, check exact pixel coordinates, and inspect a flattened PNG before sharing.
You need to show a support team a printer error, but the same screenshot contains an email address, an access key and an account note. The useful result is a readable error report with those three areas replaced by opaque pixels. This exercise uses invented data so you can learn the workflow before opening a real screenshot.
1. Start with a screenshot you can verify
Download the fictional 640 × 360 screenshot below. It contains alex@example.invalid, DEMO-KEY-0072-NOT-REAL and ACCOUNT: TEST-0042 / CASE: DEMO. These are examples, not a mailbox, credential or real account. The bottom line, “Keep visible: issue = printer offline”, should remain readable.
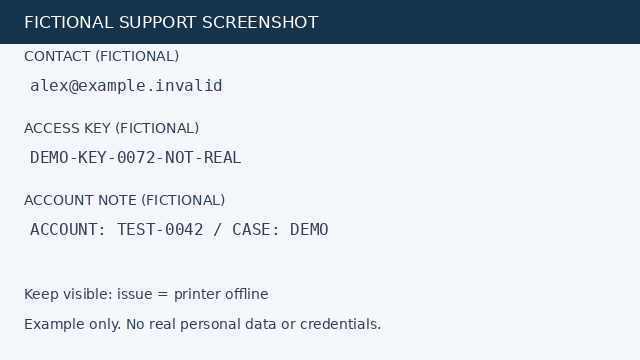
Open the screenshot redactor and choose the downloaded PNG. You can also use Try a fictional screenshot inside the tool. That built-in drawing uses the same dimensions and mask coordinates, although font rendering may differ. The coordinate origin is the upper-left corner: x moves right and y moves down. Dimensions refer to source pixels, even when the preview is reduced on a phone.
2. Add three opaque rectangles
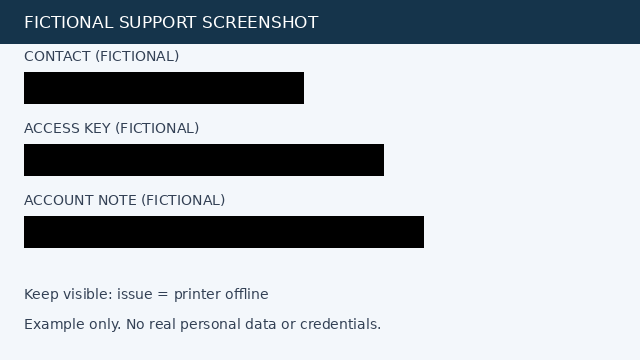
For the contact line, enter Left 24, Top 72, Width 280 and Height 32, then select Add opaque rectangle. Repeat for the key with 24, 144, 360, 32; then for the account note with 24, 216, 400, 32. The list should contain three masks. Alternatively, the built-in example has a button that adds these three masks for you.
Dragging only creates a pending selection. Add the rectangle to apply it. The numeric fields provide the same workflow without a pointer. In the focused preview, arrow keys move the pending rectangle, Shift + arrow changes its size, and Alt uses 10-pixel steps. Enter applies it; Escape cancels it. Add a little extra margin when working on real text so antialiased edges do not remain outside the rectangle.
3. Export pixels and check the result
Create a flattened PNG and download redacted-screenshot.png. Open that downloaded file separately. Removing a mask in the editor changes the in-memory source preview; it cannot restore pixels in the already-exported PNG. Any edit invalidates the tool’s existing download, so create a new export after a correction. The original local file is not overwritten.
For the supplied fixture, the expected result is precise: 33,280 pixels are opaque black, with RGBA values 0, 0, 0, 255. All other 197,120 pixels stay identical in the reference output. The first rectangle covers x=24 through 303 and y=72 through 103 inclusive. Its right and bottom boundaries, x=304 and y=104, are outside that rectangle. Compare the exported file with the expected PNG below. The fixture’s source text-metadata chunk is absent from the reference PNG.
Download expected redacted PNG
4. Review the rest of the image
At 100% zoom, inspect every mask edge. Then scan browser tabs, the address bar, notifications, sidebars, avatars, filenames, QR codes and repeated copies of the same value. A black rectangle only changes its selected pixels. Nearby wording or layout can still identify a person or disclose a project. Crop unnecessary context before redacting if that makes the review simpler.
Limits and the next step
The tool accepts still PNG, JPEG and WebP files up to 20 MB, 20 megapixels and 8,000 pixels per side. Export is a new PNG with opaque black masks and a white background under transparent areas. There are no editable mask layers or embedded originals. Source metadata is not copied; browser-generated encoding information and color differences are possible. This is not automatic detection or a guarantee that every sensitive detail has been found.
Use the cropper to reduce an oversized screenshot or remove irrelevant regions. Use the metadata cleaner when you need a fresh image copy without covering visible content. Neither task substitutes for visually reviewing the redacted file. Share only the reviewed export, not the original or an editor screenshot.